Thursday, December 4, 2014

One Easy Way to Reduce Treatment Time and Broken Braces


In a previous posting, I talked about controlling vertical growth problems by placing composite resin or glass ionomer cement on the occlusal surface of terminal molars.  You can also place composite on the lingual of upper anterior teeth.  How do you decide which to do? If you want to intrude molars (think open bite), use posterior turbos.  If you want to extrude molars (think deep bite) use anterior turbos.


The best way to do anterior turbos to extrude molars is with custom turbos from Kelley Incisal Blocks Laboratory.  You merely obtain an anterior alginate impression and, on the lab sheet, you specify how much overbite you want to finish with.  I usually ask for 4 mm.  You also have to specify the length of the block.  This means how much overjet there is between the incisors when there is 4 mm of overbite.  This must be determined clinically but I usually just ask for 9 mm and cut away what I don’t need.  Almost always they are placed on the central incisors but can be placed on the lateral incisors if appropriate.


To bond these into place, you merely micro etch or pumice the lingual of the upper central incisors and then either traditional etch for 30 seconds or use a L-pop for 5 seconds.  Place  a generous amount of flowable composite on the custom turbo surface that faces the tooth.  No bonding resin required.*  Then place the custom turbo on the tooth.  The cap insures that it is at the proper height.  Do not etch the incisal 1 mm of the tooth so that the cap will be easy to remove.

*No sealant makes it easier to remove the cap at the end of this phase of treatment.  If you are dealing with a deep bite particularly in a teenage male carnivore, use Assure or something similar to enhance bond strength.


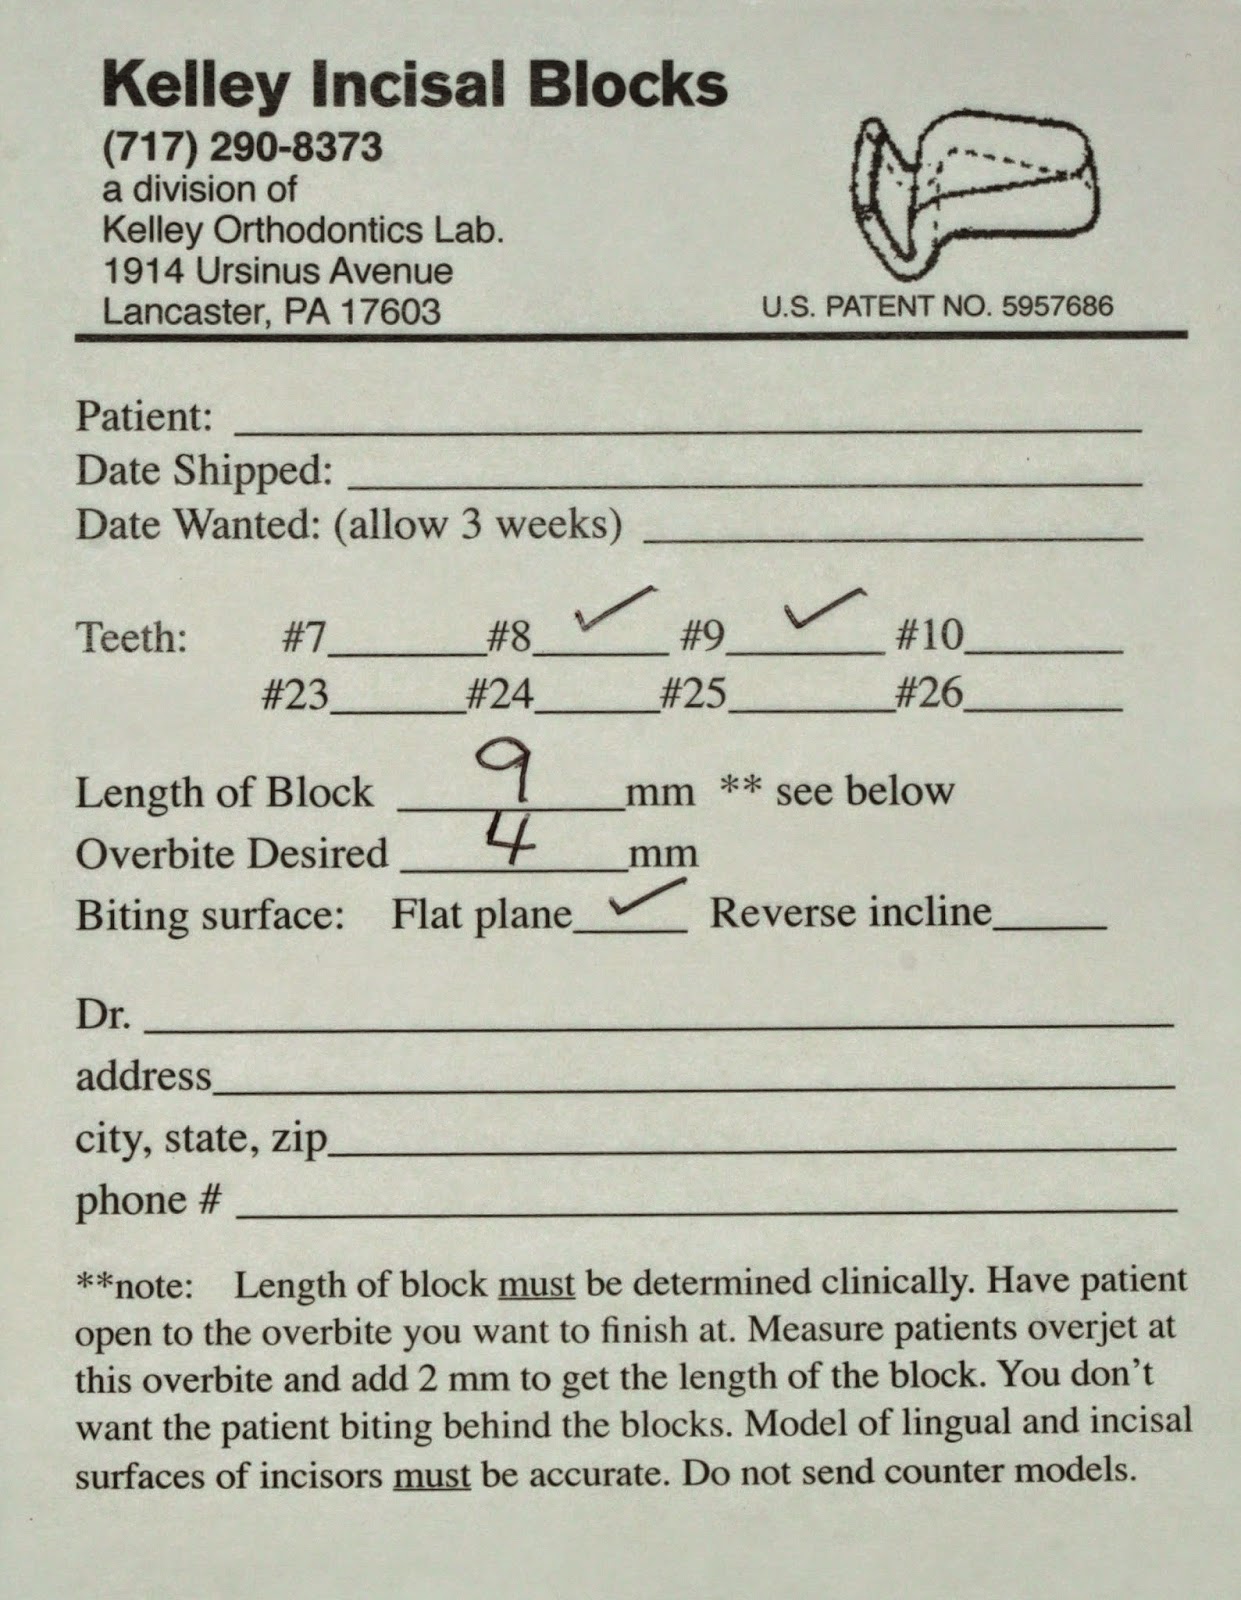
Light cure for 30 seconds.  Then use a #8 round bur in a slow speed to remove the cap and to smooth out the lingual anatomy as necessary.  You can advise light chewing for the next 24 hours but these things are pretty rugged and they rarely come off.  Depending on your state laws, all of the above can be delegated.  Finally, mark with blue paper and decide whether you need to full 9 mm or you can remove the excess with a straight diamond in a high speed.


In the photo below right, you can see I cut back on the length of the block.  I usually leave the turbos in until I am in a full size lower working wire.  For me that is a 19x25 in a 22 slot.  So that usually means 6 months.  You only have to grab the sides of the turbo with a How plier and squeeze once or twice to remove it.  Typically this fractures the cement and the turbo comes off.

Some people like to put these on during space closure if extractions were done or even in a deep bite non extraction case.  By opening the bite, you facilitate tooth movement.
                                                                           
Please make any comments or ask any questions below.


Thursday, November 13, 2014

Modifying a Nance Button To Use As a Bite Plane


While I use turbos of all sizes and locations, sometimes using a bite plate is the way to go.  Unfortunately, patients don’t seem to like removable bite plates as much as orthodontists like them.  So following the lead of my restorative colleagues (“I do fixed everything if possible, nothing removable”), I started doing fixed bite plates quite some time ago.

You start with a Nance button (see my post of October 11, 2014) and then extend the acrylic up on the lingual of the central and lateral incisors. (see the first image)

After curing the acrylic and removing the Nance from the model, you will notice that the underside of the acrylic that touches the central and lateral incisors has the images of those teeth.  You need to polish the images of those teeth away.  (see the 2nd and 3rd images)  If the acrylic does not actually touch the lingual of the upper incisors, you have nothing to worry about as far as decals go.  Please note that I did not trim the acrylic on the lingual of the laterals since I had planned to grind away that entire area.

Please make any comments or ask any questions below.

In my next post, I will discuss several different approaches to posterior and anterior turbos.


Sunday, November 2, 2014

Improving Nance Button Use


Now that many of us have migrated our anchorage needs to miniscrews, there is less call for Nance buttons as anchorage enhancers.  They still have a use though.  Here are some ideas on optimizing the use of Nance buttons as well as reducing patient problems:

1. Keep the acrylic portion as large as possible.  Think half dollar not nickel sized acrylic.  The use of larger acrylic buttons reduces the pressure in any particular area.
2. Don’t impinge on the incisal papilla.
3. Ask your lab to use Triad gel for the acrylic portion and not to treat the tissue side of the acrylic with any type of oxygen barrier to eliminate the oxygen inhibition layer.
4. When delivering the appliance, place a thin layer of Triad gel on the entire tissue surface and seat the appliance to the same degree you would if cementing it.  This can be delegated.
5. Light cure the Triad gel in the mouth for 15 seconds.  It gets very warm so don’t overdue the curing time.  This can be delegated.
6. Continue to light cure out of the mouth and trim the excess.  This can also be delegated.
7. Cement the appliance as your normally would.

The Triad gel addition before cementation creates a truly customized appliance with a very intimate adaptation to the patients soft tissue.  This will virtually eliminate emergencies since nothing will be able to lodge underneath the acrylic and cause discomfort.  Also, by having a custom surface, you reduce any pressure points during the use of the Nance button.  When you remove the appliance, you will be amazed at how healthy the tissue looks.

Please feel free to comment or ask questions below.


Saturday, October 11, 2014

How to Control Open Bite Tendencies with Fixed Appliance Therapy


In the old days of orthodontics, the rule for patients who were vertically challenged was to not bracket the second molars.  Bracketing the lower 7s especially was viewed as a way to open the wedge and create a true open bite in a susceptible patient.  This approach was clearly a compromise since not bracketing the 7s allowed them to "wander" and sometimes resulted in a weird final occlusion.

The current approach is the opposite.  In general, you want to bracket the lower 7s as soon as possible.  Uppers also if they are available.  Then if you fear opening the bite is a possibility, you place a bonded bite turbo on the buccal cusps of the lower second molars.  If the lower 7s are not available, you can do the same thing with the last tooth in the lower strap up, the first molar, and then duplicate this when the lower 7s erupt.

At the same time (first or second visit) you ask the patient to wear vertical elastics (deltas) from the upper 3s to the lower 3s and 4s.

The idea is to prevent bite opening by keeping the molars intruded and supplementing the action of the masticatory muscles with elastics.

Finally, when bracketing the upper second molars, be very careful about accidentally extruding the 7s.  This is best accomplished by setting the bracket height to no more than 2 mm below the cusp tip. Rick McLaughlin calls this approach "hanging the bracket in space" since it seems that it is barely on the tooth.

Please feel free to comment or ask questions below.